Brother HL-1430 Guide de l'utilisateur
Naviguer en ligne ou télécharger Guide de l'utilisateur pour Imprimantes laser/LED Brother HL-1430. Brother HL-1430 User`s guide Manuel d'utilisatio
- Page / 95
- Table des matières
- DEPANNAGE
- MARQUE LIVRES
- User's Guide 1
- HL-1430 series 2
- To use the printer safely 3
- Register your product 4
- International ENERGY STAR 5
- Compliance Statement 5
- Internal laser radiation 6
- IMPORTANT - For Your Safety 7
- Wiring information (for UK) 8
- Trademarks 9
- Table of Contents 11
- About this printer 13
- Front view 14
- Back view 15
- Positioning the printer 16
- What kind of paper can I use? 17
- Recommended paper 18
- Printable area 19
- Printing methods 20
- Figure 1-6 21
- Figure 1-7 21
- 1 - 10 ABOUT THIS PRINTER 22
- ABOUT THIS PRINTER 1 - 11 23
- 1 - 12 ABOUT THIS PRINTER 24
- ABOUT THIS PRINTER 1 - 13 25
- 1 - 14 ABOUT THIS PRINTER 26
- ABOUT THIS PRINTER 1 - 15 27
- 1 - 16 ABOUT THIS PRINTER 28
- Printing on envelopes 29
- 1 - 18 ABOUT THIS PRINTER 30
- ABOUT THIS PRINTER 1 - 19 31
- 1 - 20 ABOUT THIS PRINTER 32
- Printing on transparencies 33
- 1 - 22 ABOUT THIS PRINTER 34
- Figure 1-27 35
- 1 - 24 ABOUT THIS PRINTER 36
- ABOUT THIS PRINTER 1 - 25 37
- 1 - 26 ABOUT THIS PRINTER 38
- ABOUT THIS PRINTER 1 - 27 39
- Figure 1-35 40
- ABOUT THIS PRINTER 1 - 29 41
- Figure 1-38 42
- ABOUT THIS PRINTER 1 - 31 43
- Driver and software 44
- For Windows 45
- Advanced tab 46
- DRIVER AND SOFTWARE 2 - 4 47
- 2 - 5 DRIVER AND SOFTWARE 48
- DRIVER AND SOFTWARE 2 - 6 49
- Accessories tab 50
- Support tab 51
- For Macintosh 52
- Specific settings 53
- Control panel 54
- Printer status 55
- Figure 3-2 55
- Figure 3-3 55
- Figure 3-4 55
- Figure 3-5 55
- CONTROL PANEL 3 - 3 56
- Figure 3-10 57
- Service call indications 58
- 3 - 6 CONTROL PANEL 59
- Control panel buttons 60
- Print a test page 61
- Ir-DA Interface (IR-1000) 62
- Routine maintenance 63
- Toner cartridge 64
- Toner Empty message 65
- Replacing the toner cartridge 65
- ROUTINE MAINTENANCE 5 - 4 66
- 5 - 5 ROUTINE MAINTENANCE 67
- ROUTINE MAINTENANCE 5 - 6 68
- 5 - 7 ROUTINE MAINTENANCE 69
- Drum unit 70
- Replacing the drum unit 71
- ROUTINE MAINTENANCE 5 - 10 72
- 5 - 11 ROUTINE MAINTENANCE 73
- Cleaning 74
- Replacing maintenance parts 75
- Troubleshooting 76
- 6 - 2 TROUBLESHOOTING 77
- Error message printouts 78
- Paper handling 79
- TROUBLESHOOTING 6 - 5 80
- Figure 6-3 81
- Figure 6-4 81
- Open the front cover 81
- TROUBLESHOOTING 6 - 7 82
- 6 - 8 TROUBLESHOOTING 83
- TROUBLESHOOTING 6 - 9 84
- Other problems 85
- ABCDEFGH 86
- Examples of poor print 87
- Recommendation 87
- Solving print problems 90
- Appendix 91
- Dimensions / Weights 92
- Media specifications 92
- Supplies 92
- Unit Europe USA 93
- 80 to 90 75 to 90 93
- APPENDIX A - 4 94
Résumé du contenu
Brother Laser PrinterHL-1430User's GuideVersion 1For visually-impaired usersPlease see the two HTML files, index_win.html and index_mac.html, on
ix“EC” Declaration of ConformityManufacturerBrother Industries Ltd.,15-1, Naeshiro-cho, Mizuho-ku,Nagoya 467-8561, JapanPlantBrother Corporation (Asia
xTable of ContentsDefinitions of warnings, cautions, and notes ... -iTo use
xiService call indications ... 3-5Control pa
ABOUT THIS PRINTER 1 - 11What is in the box?When you unpack the printer, check to see that you have all of the following parts.1AC Power Cord2Drum U
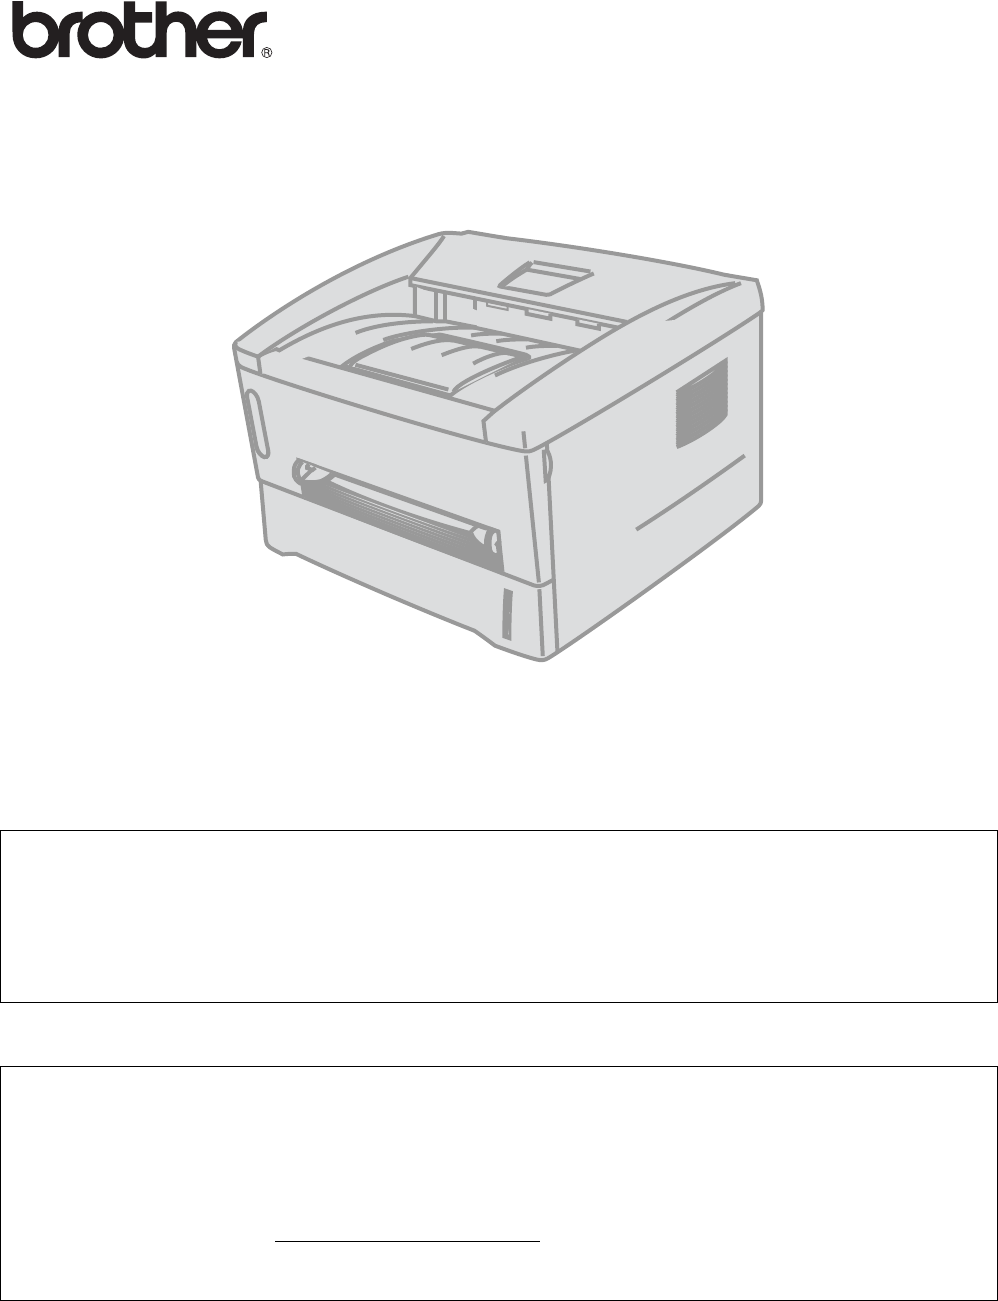
1 - 2 ABOUT THIS PRINTERFront viewFront View Figure 1-11Face-down Output Tray Support Flap (Support Flap) 2Face-down Output Tray (Top Output Tray)3F
ABOUT THIS PRINTER 1 - 3Back viewBack viewFigure 1-21Rear Cover2Power Switch3AC Power Connector4Parallel Interface Connector5USB Interface Connector
1 - 4 ABOUT THIS PRINTERPositioning the printerPlease read the following before you use the printer. Power supplyUse the printer within the recommen
ABOUT THIS PRINTER 1 - 5What kind of paper can I use?Type and size of paperThe printer loads paper from the installed paper tray or manual feed slot
1 - 6 ABOUT THIS PRINTERRecommended paper Before you buy a lot of paper, please test some to make sure that the paper is suitable. Use paper that
ABOUT THIS PRINTER 1 - 7Printable areaWhen using Brother GDI printer driver emulation, the edges of the paper that cannot be printed on are shown be
iLaser printerHL-1430 seriesUser's GuideDefinitions of warnings, cautions, and notesWe use the following terms throughout this User’s Guide:You m
1 - 8 ABOUT THIS PRINTERPrinting methodsPrinting on plain paper You can print on plain paper from the paper tray or manual feed slot. For the paper
ABOUT THIS PRINTER 1 - 93While pressing the blue paper-guide release lever, slide the paper guides to fit the paper size. Check that the guides are
1 - 10 ABOUT THIS PRINTER5Put the paper tray firmly back in the printer. Check that it is inserted fully into the printer.6Send the print data to th
ABOUT THIS PRINTER 1 - 11Printing on plain paper from the manual feed slot 1Select the Paper Size, Media Type, Paper Source, and other settings in t
1 - 12 ABOUT THIS PRINTER3Using both hands, slide the manual feed slot paper guides to the paper width to be used.Figure 1-114Using both hands, inse
ABOUT THIS PRINTER 1 - 135After the printed page comes out of the printer, put in the next sheet of paper as in Step 4 above. Repeat for each page t
1 - 14 ABOUT THIS PRINTERPrinting on thicker paper and card stock When the rear cover is lifted up, the printer has a straight paper path from the m
ABOUT THIS PRINTER 1 - 153Send the print data to the printer.4Using both hands, set the width of the manual feed paper guides to the paper width you
1 - 16 ABOUT THIS PRINTER6After the printed page comes out of the printer, put in the next sheet of paper as in Step 5 above. Repeat for each page t
ABOUT THIS PRINTER 1 - 17Printing on envelopes Types of envelopes to avoidDo not use envelopes: that are damaged, curled, wrinkled, or an usual sha
iiTo use the printer safelyCautionUse water or neutral detergents for cleaning. Cleaning with volatile liquids such as thinner or benzene will damage
1 - 18 ABOUT THIS PRINTERPrinting on envelopes from the manual feed slot When the rear cover is lifted up, the printer has a straight paper path fro
ABOUT THIS PRINTER 1 - 193Send the print data to the printer.4Using both hads, set the width of the manual feed paper guides to the envelope width.
1 - 20 ABOUT THIS PRINTER6After the printed envelope comes out of the printer, the printer will wait until you put in the next envelope. Repeat Step
ABOUT THIS PRINTER 1 - 21Printing on transparenciesYou can print on transparencies from the paper tray, manual feed slot.Printing on transparencies
1 - 22 ABOUT THIS PRINTER3While pressing the blue paper-guide release levers, slide the paper guides to fit the transparency size. Check that the gu
ABOUT THIS PRINTER 1 - 235Put the paper tray firmly back in the printer.6Send the print data to the printer.CautionRemove each transparency immediat
1 - 24 ABOUT THIS PRINTERPrinting on transparencies from the manual feed slotWhen the rear cover is lifted up, the printer has a straight paper path
ABOUT THIS PRINTER 1 - 253Send the print data to the printer4Using both hands, slide the manual feed paper guides to the transparency width.Figure 1
1 - 26 ABOUT THIS PRINTER6After the printed transparency comes out of the printer, put in the next transparency as described in Step 5 above. Repeat
ABOUT THIS PRINTER 1 - 27Printing on both sides of the paper (Manual duplex printing)The supplied printer drivers for Windows® 95/98/Me, Windows NT®
iiiRegister your productFrequently asked questions (FAQs)By registering your product with Brother, you will be recorded as the original owner of the p
1 - 28 ABOUT THIS PRINTER4Remove the printed even-numbered pages from the output tray and put them back in the paper tray, placing the paper with th
ABOUT THIS PRINTER 1 - 29Manual Duplex printing from the manual feed slot Before you put the sheets back in the manual feed slot, you will have to
1 - 30 ABOUT THIS PRINTER4Remove the printed even-numbered pages from the output tray and put them in the same order back into the manual feed slot.
ABOUT THIS PRINTER 1 - 31Guidelines for printing on both sides of the paper If the paper is thin, it may wrinkle. If paper is curled, straighten i
2 - 1 DRIVER AND SOFTWARE2Printer driver A printer driver is software that translates data from the format used by a computer to the format that a p
DRIVER AND SOFTWARE 2 - 2For Windows® Features in the Brother printer driverYou can also change settings by clicking the illustration on the left si
2 - 3 DRIVER AND SOFTWAREAdvanced tab Change the tab settings by clicking the following icons:1Print Quality2Duplex3Watermark 4Page Setting5Device O
DRIVER AND SOFTWARE 2 - 41Print QualitySelect the resolution, toner save and print settings or gray printing setting.ResolutionYou can change the re
2 - 5 DRIVER AND SOFTWARE5Device OptionsYou can set the following Printer Function modes in this tab:(You can jump to the page for each Printer Func
DRIVER AND SOFTWARE 2 - 6Job SpoolingThe printer saves data that you want reprinted.You can reprint a document without sending the data again from y
ivImportant information: RegulationsRadio interference (220 to 240 volt model only)This printer follows EN55022 (CISPR Publication 22)/Class B.Before
2 - 7 DRIVER AND SOFTWAREAccessories tab When you install some options, you can add it and select its settings in the Accessories tab as follows.1Yo
DRIVER AND SOFTWARE 2 - 8Support tab You can download the latest driver by accessing the Brother Solutions Center at http://solutions.brother.com
2 - 9 DRIVER AND SOFTWAREFor Macintosh® This printer supports Mac® OS 8.6 to 9.2 and Mac® OS X 10.1 to 10.2.You can download the latest driver by ac
DRIVER AND SOFTWARE 2 - 10Specific settingsSet the Media Type, Resolution, Toner Save, and other settings.
CONTROL PANEL 3 - 13This section refers to the Light Emitting Diodes (LEDs) and Control panel button on the control panel. Figure 3-1The LED indicat
3 - 2 CONTROL PANELLEDPrinter statusFigure 3-2Sleep modeThe power switch is off or the printer is in Sleep mode. Pressing the Control panel button w
CONTROL PANEL 3 - 3Figure 3-6Data remaining in memoryPrint data remains in the printer memory. If the Data LED is on for a long time and nothing has
3 - 4 CONTROL PANELFigure 3-10Paper jam Clear the paper jam. See Paper jams and how to clear them on page 6-5. If the printer does not start printin
CONTROL PANEL 3 - 5Service call indicationsIf there is an error that cannot be corrected, the printer will show that a service call is needed by lig
3 - 6 CONTROL PANELTable 1: LED indications when the service error occursMake a note of the indication and report the error status to your dealer or
vIEC 60825 specification (220 to 240 volt model only)This printer is a Class 1 laser product as defined in IEC 60825 specifications. The label shown b
CONTROL PANEL 3 - 7Control panel buttons The control panel buttons have the following functions:Cancel printingIf you press the Control panel button
3 - 8 CONTROL PANELPrint a test pageYou can use the Control panel button or the printer driver to print a test page.Using Control panel button1Turn
OPTIONS 4 - 14Ir-DA Interface (IR-1000)IR-1000 connects to any printer and prints data without using connecting cables. Supports IrDA1.1 infrared c
5 - 1 ROUTINE MAINTENANCE5You will need to replace certain parts and clean the printer on a regular basis. You can see the maintenance video in the
ROUTINE MAINTENANCE 5 - 2Toner cartridge A new toner cartridge contains enough toner to print up to 3,000 (TN-standard cartridge) or up to 6,000 (TN
5 - 3 ROUTINE MAINTENANCEToner Empty messageIf the LED shows the message below, the printer has run out of toner or the toner is not evenly distribu
ROUTINE MAINTENANCE 5 - 4Caution We recommend that you place the drum unit assembly on a piece of disposable paper or cloth in case you accidentall
5 - 5 ROUTINE MAINTENANCECaution Wait to unpack the toner cartridge until immediately before you put it in the printer. If toner cartridges are lef
ROUTINE MAINTENANCE 5 - 6CautionPut the toner cartridge in the drum unit immediately after you have removed the protective cover. Do not touch the s
5 - 7 ROUTINE MAINTENANCE7Clean the primary corona wire inside the drum unit by gently sliding the blue tab from right to left and left to right sev
viIMPORTANT - For Your SafetyTo ensure safe operation the supplied three-pin plug must be inserted only into a standard three-pin power outlet that is
ROUTINE MAINTENANCE 5 - 8Drum unitThis printer can print up to 20,000 pages* with one drum unit.* At 5% print coverage (A4 or Letter size). The actu
5 - 9 ROUTINE MAINTENANCEReplacing the drum unitFollow these steps to replace the drum unit. You can also view the drum unit replacement method in t
ROUTINE MAINTENANCE 5 - 103Hold down the blue lock lever and take the toner cartridge out of the drum unit assembly.Figure 5-16CautionHandle the ton
5 - 11 ROUTINE MAINTENANCE6Put the drum unit assembly in the printer.Make sure that the printer is turned on, the front cover is open and the Drum a
ROUTINE MAINTENANCE 5 - 12CleaningClean the outside and inside of the printer regularly with a dry soft cloth. When you replace the toner cartridge
5 - 13 ROUTINE MAINTENANCEReplacing maintenance partsYou need to replace the maintenance parts regularly to maintain print quality. You should repla
TROUBLESHOOTING 6 - 16Identifying your problemFirst, check the following: The power plug is connected properly and the printer is turned on. All o
6 - 2 TROUBLESHOOTINGError messages in the status monitorThe Status Monitor will report problems with the printer. Take the corrective actions liste
TROUBLESHOOTING 6 - 3Error message printoutsThe printer will report problems by printing an error message as defined in the following table. Take th
6 - 4 TROUBLESHOOTINGPaper handling First, make sure that you are using paper that meets Brother recommended paper specifications. See What kind of
viiWiring information (for UK)ImportantIf the mains plug that is supplied with this printer is not suitable for your plug socket, remove the plug from
TROUBLESHOOTING 6 - 5Paper jams and how to clear themWhen a paper jam occurs, the printer indicates it by lighting the control panel LEDs as shown b
6 - 6 TROUBLESHOOTING1Pull the paper tray completely out of the printer. Figure 6-32Pull the jammed paper up and out of the printer.Figure 6-43Open
TROUBLESHOOTING 6 - 74Pull out the drum unit assembly. Pull the jammed paper up and out of the printer. If you cannot remove the drum unit assembly
6 - 8 TROUBLESHOOTING5Open the rear cover. Pull the jammed paper out of the fuser unit. Figure 6-7CautionAfter you have just used the printer, some
TROUBLESHOOTING 6 - 97Push the lock lever down and take the toner cartridge out of the drum unit assembly. Take out the jammed paper if there is any
6 - 10 TROUBLESHOOTINGOther problemsFor Macintosh® with USBImproving the print qualityThis section provides information on the following topics:Prob
TROUBLESHOOTING 6 - 11Ghost Make sure you use paper that meets our specifications. Rough-surfaced paper or thick print media may cause this problem
6 - 12 TROUBLESHOOTINGWhite Spots on black text and graphics at 94 mm (3.7 in.) intervalsBlack Spots at 94 mm (3.7 in.) intervals If the problem is
TROUBLESHOOTING 6 - 13Black toner marks across the page The drum unit may be damaged. Put in a new drum unit. See Replacing the drum unit on page 5
6 - 14 TROUBLESHOOTINGWhite lines down the page You may clear the problem by wiping the scanner window with a soft cloth. See Cleaning on page 5-12
viiiTrademarksThe Brother logo is a registered trademark of Brother Industries, Ltd. Apple, the Apple Logo, and Macintosh are registered trademarks in
TROUBLESHOOTING 6 - 15Solving print problemsProblem RecommendationThe printer prints unexpectedly or it prints garbage data. Make sure the printer
A - 1 APPENDIXAPrinter specificationsEngine*1 From standard paper trayController*2) Not available on Windows® XP and Mac® OS *3) Optional accessorie
APPENDIX A - 2Paper handling*5) Calculated with 80 g/m2 paper*6) Not available on Mac® OS X 10.2Media specifications*7) Up to 10 sheetsSuppliesDimen
A - 3 APPENDIXImportant information for choosing your paperThis section provides information to help you choose paper to use with this printer.Befor
APPENDIX A - 4Moisture contentMoisture content is the amount of water left in the paper after manufacture. It is one of the important characteristic
I - 1INDEXAAccessories tab ............2-7BBrother numbers (USA/Canada) ...... -iiiBrother Solutions Ce
Produits connexes et manuels pour Imprimantes laser/LED Brother HL-1430
 (96 pages)
© 2020, manymanuals.fr. Tous droits réservés | 1.772 s |
 Manymanuals.com
 Manymanuals.de
 Manymanuals.fr
 Manymanuals.it
 Manymanuals.pl
 Manymanuals.cz
 Manymanuals.es
 Manymanuals-pt.com
Commentaires sur ces manuels